How to replace a drill chuck?
6 July 2017
During operation, the drill from time to time jams or fails the cartridge. Because of this, it has to be disassembled, repaired or replaced with a new one. In this article we will discuss how to change the chuck for drills.

Types of cartridges
All drill cartridges are interchangeable, so one type can always be replaced by another. (it is only important that the thread in the bushing matches). First you need to decide on the type of cartridges:
 |
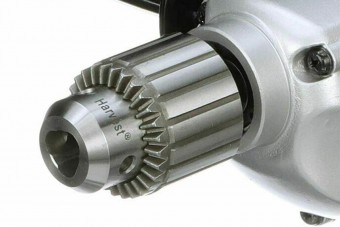
- key (universal). A cartridge of this type consists of cams (lobes) with a thread in the base, which are planted in an adjustment sleeve. It, in turn, is equipped with a gear engagement (round groove), where the key is inserted, and the cams are tightened / released. Accordingly, the working body is clamped or released depending on the direction of rotation of the key.
 |
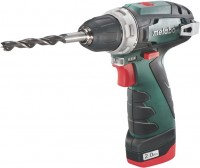
- quick-release. The clutch of the quick-release chuck does not have a key hole, but is regulated by running-in along the thread of the petals. Counterclockwise rotation spreads the cams, and clockwise on the contrary reduces. The adjustment is done manually, without additional tools.
The tool needed to replace the cartridge
Using the following tools, the cartridge is replaced with drills:
- slotted and phillips screwdrivers;
- litol;
- anti-rust agent type WD-40;
- vise;
- pliers or hexagon;
- key (for the key cartridge).
Replacement of the key cartridge
The procedure for replacing a universal type cartridge is performed as follows:
- First, with the help of a key, we dilute the cams so that a hole is formed into which a phillips screwdriver will fit. Then, using a screwdriver, unscrew the mounting bolt. Please note that the bolt has a left thread, so you need to unscrew it clockwise. If the bolt is rusty and does not break, then add a little WD-40 inside and wait 2-3 minutes. After that, the bolt should be easily unscrewed.
 |
- The next step is to remove the cartridge. To do this, you need to put the drill on the edge of the table so that the cartridge completely hangs down. Then unscrew the drill body and remove the cover. With one hand we press the gear and the cooling carriage, and with the other we insert the key into the gear engagement, and with a sharp downward movement we "tear off" the fastening of the element. Then it is easily unscrewed manually counterclockwise.
- Before installing a new part, the shaft must be lubricated with lithol. Note that the thread pitch on the new cartridge must be the same as the thread pitch on the old cartridge. Otherwise, it just won't wind up on the shaft. We spin the new part so that the petals completely disperse. After that, we wind the cartridge by hand onto the shaft already lubricated with lithol. We return the plastic body of the drill to its place and tighten all the bolts with a screwdriver or screwdriver.
- The final stage is the installation of the mounting bolt. It needs to be lubricated with lithol so that next time it unwinds easier. We tighten the bolt counterclockwise, but do not tighten it until it stops. Then we check the operability of the device by installing a drill, and starting the drill in operation.
Replacement of the quick-release cartridge
By design, the quick-release chuck is almost identical to the key one, with the only difference in the absence of a turnkey hole. How to remove the chuck from the drill if it has a quick-release design? The following sequential actions will help in this:
- Using a screwdriver or a phillips screwdriver, we unscrew the drill body and remove the cover. Then rigidly fix the drill in the vise in such a way that the shaft gear does not scroll, and only the cartridge remains free. Some models have slots on the body for cooling gears. In them, you can lock the gear with a slotted screwdriver by inserting it into the slot, and thus do without a vise.
- With one hand, we unscrew the sleeve so that the cams are completely divorced. Next, we take a phillips screwdriver and unscrew the bolt with the left thread, as we did with the cam chuck.
- Since there is no key hole in the quick-release cartridge, we unscrew it in a fundamentally different way. Inside the part we insert a longer and thicker hexagon or pliers with one end. The second tool will be more convenient, as it allows you to increase the effort when unscrewing (due to two handles of pliers). We tighten the cams with the front clutch so that the tool stands rigidly. Then, with a sharp counterclockwise movement, we tear off the cartridge. Unscrew the clutch and take out the pliers. After that, the cartridge is easily unscrewed with one hand.
 |
- Before installing a new cartridge, lubricate the shaft and the mounting bolt with lithol in order to make the subsequent revision of the power tool easier. Screw the new cartridge with your hand and tighten it well. Then screw the mounting bolt back into the groove — the quick-release chuck is replaced. After installing a new part, be sure to check its operability by clamping the drill and drilling at maximum speed. This procedure must be performed after each replacement or revision of the cartridge.
See also:
High-quality video recording: TOP 5 high-definition car recorders
Video recording of the traffic situation with maximum frame detail.
Video recording of the traffic situation with maximum frame detail.
5 low-cost fixed objects for SLR cameras
We select an inexpensive object to replace or in addition to the "whale" .
We select an inexpensive object to replace or in addition to the "whale" .
Throne for the little ones: TOP 5 high chairs for feeding
A piece of essential furniture for the period of introduction of complementary foods to the child.
A piece of essential furniture for the period of introduction of complementary foods to the child.
Anti-crisis upgrade: we are building a gaming PC for $500 (second half of 2017)
A computer with a six—core processor and a gaming graphics card — for only $ 500.
A computer with a six—core processor and a gaming graphics card — for only $ 500.
Cinema in front of a home sofa: TOP 5 TVs with a screen size of 65+ inches
Five modern UltraHD TVs with a turn under 2 metres and even more.
Five modern UltraHD TVs with a turn under 2 metres and even more.
Popular models


Articles, reviews, useful tips
All materials
What is the best screwdriver?
Among thousands of screwdrivers, you can find one that surpasses the rest in all respects. Or is it impossible?
TOP 5 professional cordless drills and screwdrivers
Quality cordless tools for professional use on construction sites and workshops
Five great impact drills for home and professional repairs
Corded drills that can drill not only wood, metal and plastic, but also brick or concrete

Proper storage methods for power tool batteries
Conditions under which batteries will not lose capacity during extended storage

Which screwdriver is better: 12V, 18V or 24V?
Why are cordless screwdrivers equipped with batteries with different voltages: from 10.8 V to 24 V? Which ones are better?
Drill chuck: types and differences
Specifics of different types of chucks for drilling and working with fasteners